In this blog, we will discuss one particular data grid platform from Redhat namely JBoss Data Grid (JDG). We will firstly cover how to access and install this data grid platform and then we will demonstrate how to develop and deploy a simple remote client/server data grid application which utilises the HotRod protocol. We will be using the latest release JDG 6.2 from Redhat in this article.
Installation Overview
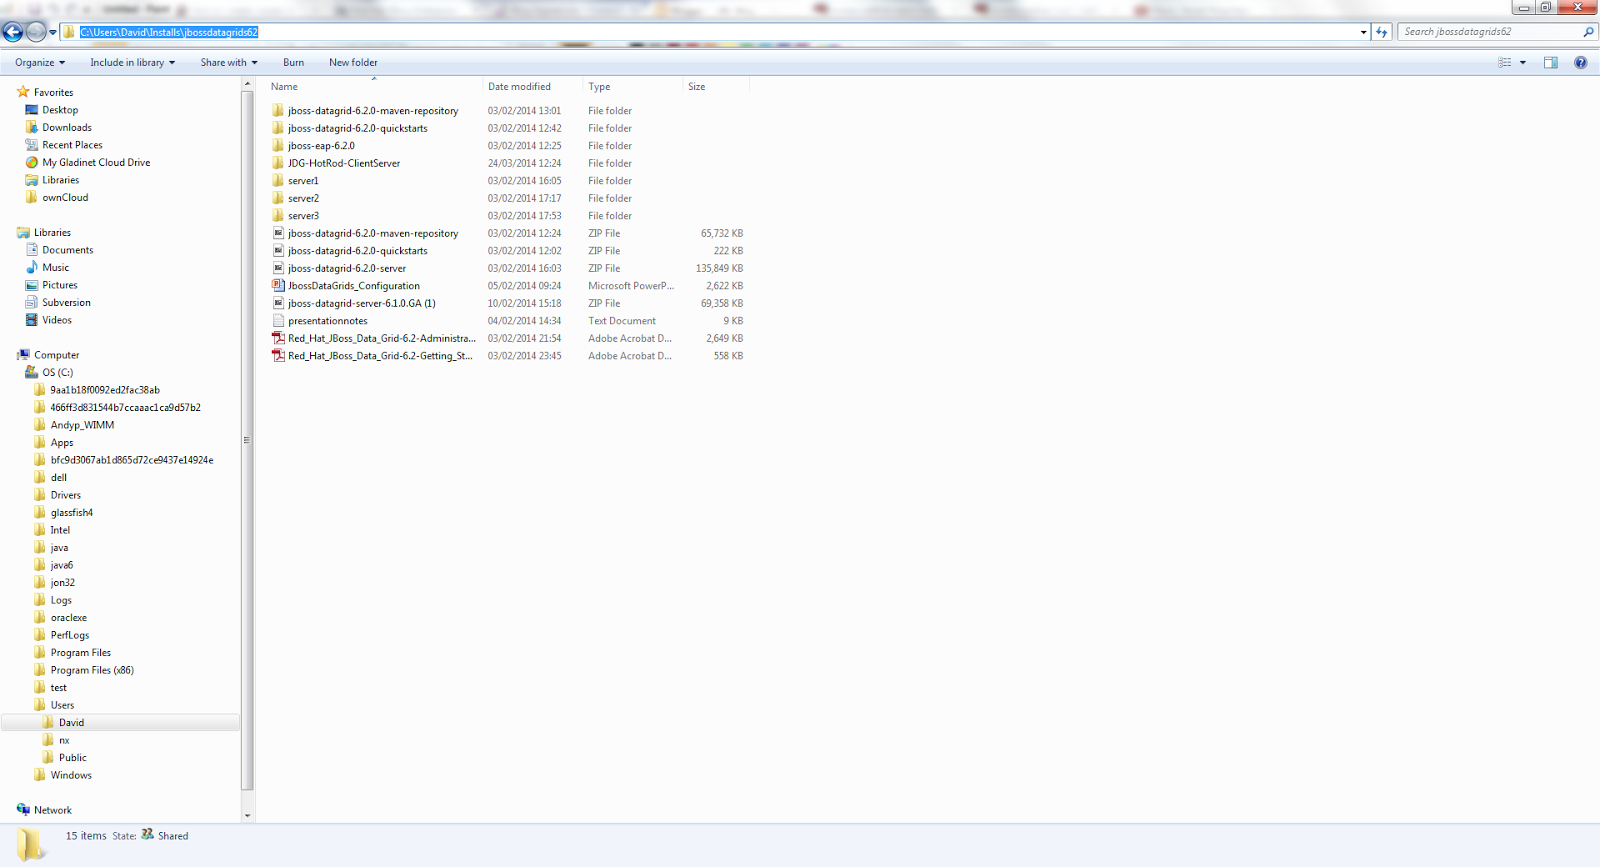
To start using JDG, firstly log on to the redhat site https://access.redhat.com/home and download the software from the Downloads section of the site. We wish to download JDG 6.2 server by clicking on the appropriate links in the Downloads section. For future reference, it is also useful to download the quickstart and maven repository zip files. To install JDG, we simply unzip the JDG server package into an appropriate directory in your environment.
![]()
JDG Overview
In this section, we will provide a brief overview of the contents of the JDG installation package and the most notable configuration options available to users. Out of the box, users are provided with two runtime options either to run JDG in standalone or clustered mode. We can start JDG in either mode by invoking the stanadalone or clustered start up scripts in the <JDG_HOME>/ bin directory. To configure the JDG in either mode we need to configure the files standalone.xml and clustered.xml. In our case we will creating a distributed cache which will run on 3 node JDG cluster so we will be utilizing the clustered startup script.
In order to set up and add new cache instances to JDG, we modify the infinispan subsystems in the appropriate xml configuration file above. We should also note the principal difference between the standalone and clustered configuration file is that in the clustered configuration file there is a JGroups subsystem configured element which allows for communication and messaging between configured cache instances running in a JDG cluster.
Development Environment Setup and Configuration
In this section, we will detail how to develop and configure a simple datagrid application which will be deployed to a 3 node JDG cluster. We will demonstrate how to configure and deploy a distributed cache in JDG and also show how to develop a HotRod Java client application which will be used to insert, update and display entries in the distributed cache. We will firstly discuss setting a new distributed cache on a 3 node JDG cluster. In this example, we will run our JDG cluster on a single machine by running each JDG instance on different ports.
Firstly, we will create 3 instances of JDG by creating 3 directories (server1, server2, server3) on our host machine and unzipping each JDG installation into each directory.
![]()
We will now configure each node in our cluster by copy and renaming the clustered.xml configuration file in the <JDG_HOME>\server1\jboss-datagrid-6.2.0-server\standalone\configuration directory. We will name each of the cluster configuration files as "clustered1.xml", "clustered2.xml" and "clustered3.xml" for the JDG instances denoted by "server1", "server2" and "server3" respectively. We will now set up a new distributed cache on our JDG cluster by modifying the infinispan subsystem element in each clustered<n>.xml file. We will demonstrate this for the node denoted "server1" here by modifying the file "clustered1.xml". The cache configuration shown here will be the same across all 3 nodes.
To setup a new distributed cache named "directory-dist-cache", we configure the following elements in the file named "clustered1.xml".
<subsystem xmlns="urn:infinispan:server:endpoint:6.0">
<hotrod-connector socket-binding="hotrod" cache-container="clusteredcache">
<topology-state-transfer lazy-retrieval="false" lock-timeout="1000" replication-timeout="5000"/>
</hotrod-connector>
.........
<subsystem xmlns="urn:infinispan:server:core:6.0" default-cache-container="clusteredcache">
<cache-container name="clusteredcache" default-cache="default" statistics="true">
<transport executor="infinispan-transport" lock-timeout="60000"/>
......
<distributed-cache name="directory-dist-cache" mode="SYNC" owners="2" remote- timeout="30000" start="EAGER">
<locking isolation="READ_COMMITTED" acquire-timeout="30000" striping="false"/>
<eviction strategy="LRU" max-entries="20" />
<transaction mode="NONE"/>
</distributed-cache>
..............
</cache-container>
</subsystem>
<socket-binding-group name="standard-sockets" default-interface="public" port-offset="${jboss.socket.binding.port-offset:0}">
......
<socket-binding name="hotrod" interface="management" port="11222"/>
......
/socket-binding-group>
</server>
We will discuss they key elements and attributes relating to the configuration above.
To set the socket binding element with a port offset of 100 on "server2", we configure "clustered2.xml" with the following entry:
<socket-binding-group name="standard-sockets" default-interface="public" port-offset="${jboss.socket.binding.port-offset:100}">
![]()
Installation Overview
To start using JDG, firstly log on to the redhat site https://access.redhat.com/home and download the software from the Downloads section of the site. We wish to download JDG 6.2 server by clicking on the appropriate links in the Downloads section. For future reference, it is also useful to download the quickstart and maven repository zip files. To install JDG, we simply unzip the JDG server package into an appropriate directory in your environment.

JDG Overview
In this section, we will provide a brief overview of the contents of the JDG installation package and the most notable configuration options available to users. Out of the box, users are provided with two runtime options either to run JDG in standalone or clustered mode. We can start JDG in either mode by invoking the stanadalone or clustered start up scripts in the <JDG_HOME>/ bin directory. To configure the JDG in either mode we need to configure the files standalone.xml and clustered.xml. In our case we will creating a distributed cache which will run on 3 node JDG cluster so we will be utilizing the clustered startup script.
In order to set up and add new cache instances to JDG, we modify the infinispan subsystems in the appropriate xml configuration file above. We should also note the principal difference between the standalone and clustered configuration file is that in the clustered configuration file there is a JGroups subsystem configured element which allows for communication and messaging between configured cache instances running in a JDG cluster.
Development Environment Setup and Configuration
In this section, we will detail how to develop and configure a simple datagrid application which will be deployed to a 3 node JDG cluster. We will demonstrate how to configure and deploy a distributed cache in JDG and also show how to develop a HotRod Java client application which will be used to insert, update and display entries in the distributed cache. We will firstly discuss setting a new distributed cache on a 3 node JDG cluster. In this example, we will run our JDG cluster on a single machine by running each JDG instance on different ports.
Firstly, we will create 3 instances of JDG by creating 3 directories (server1, server2, server3) on our host machine and unzipping each JDG installation into each directory.
We will now configure each node in our cluster by copy and renaming the clustered.xml configuration file in the <JDG_HOME>\server1\jboss-datagrid-6.2.0-server\standalone\configuration directory. We will name each of the cluster configuration files as "clustered1.xml", "clustered2.xml" and "clustered3.xml" for the JDG instances denoted by "server1", "server2" and "server3" respectively. We will now set up a new distributed cache on our JDG cluster by modifying the infinispan subsystem element in each clustered<n>.xml file. We will demonstrate this for the node denoted "server1" here by modifying the file "clustered1.xml". The cache configuration shown here will be the same across all 3 nodes.
To setup a new distributed cache named "directory-dist-cache", we configure the following elements in the file named "clustered1.xml".
<subsystem xmlns="urn:infinispan:server:endpoint:6.0">
<hotrod-connector socket-binding="hotrod" cache-container="clusteredcache">
<topology-state-transfer lazy-retrieval="false" lock-timeout="1000" replication-timeout="5000"/>
</hotrod-connector>
.........
<subsystem xmlns="urn:infinispan:server:core:6.0" default-cache-container="clusteredcache">
<cache-container name="clusteredcache" default-cache="default" statistics="true">
<transport executor="infinispan-transport" lock-timeout="60000"/>
......
<distributed-cache name="directory-dist-cache" mode="SYNC" owners="2" remote- timeout="30000" start="EAGER">
<locking isolation="READ_COMMITTED" acquire-timeout="30000" striping="false"/>
<eviction strategy="LRU" max-entries="20" />
<transaction mode="NONE"/>
</distributed-cache>
..............
</cache-container>
</subsystem>
<socket-binding-group name="standard-sockets" default-interface="public" port-offset="${jboss.socket.binding.port-offset:0}">
......
<socket-binding name="hotrod" interface="management" port="11222"/>
......
/socket-binding-group>
</server>
We will discuss they key elements and attributes relating to the configuration above.
- In the infinispan endpoint subsystem, we will configure hotrod client's to connect to the JDG server instance on socket 11222.
- The name of the cache container to host each of the cache instances will be held in the container named "clusteredcache".
- We have configured the infinispan core subsystem to the default cache container named "clusteredcacahe" whereby we will allow for jmx statistics to be collected relating the configured cache entries i.e statistics="true"
- We have created a new distributed cache named "directory-dist-cache" whereby there will be two copies of each cache entry held on two of the 3 cluster nodes.
- We have also set up an eviction policy whereby should there be more than 20 entries in our cache then cache entries will be removed using the LRU algorithm
- We should have configured nodes "server2" and "server3" to start up with a port offset of 100 and 200 respectively by configuring the socketing binding group element appropriately. Please view the socket bindings noted below.
To set the socket binding element with a port offset of 100 on "server2", we configure "clustered2.xml" with the following entry:
<socket-binding-group name="standard-sockets" default-interface="public" port-offset="${jboss.socket.binding.port-offset:100}">
......
<socket-binding name="hotrod" interface="management" port="11222"/>
......
/socket-binding-group>
To set the socket binding element with a port offset of 200 on "server3", we configure "clustered3.xml" with the following entry:
<socket-binding-group name="standard-sockets" default-interface="public" port-offset="${jboss.socket.binding.port-offset:200}">
In this webinar we will look at the basics of setting up JBoss Data Grid covering installation, configuration and development. We will look at practical examples of storing data, viewing the data in the cache and removing it. We will also take a look at the different clustered modes and what effect these have on the storage of your data:<socket-binding name="hotrod" interface="management" port="11222"/>
......
/socket-binding-group>
To set the socket binding element with a port offset of 200 on "server3", we configure "clustered3.xml" with the following entry:
<socket-binding-group name="standard-sockets" default-interface="public" port-offset="${jboss.socket.binding.port-offset:200}">
......
<socket-binding name="hotrod" interface="management" port="11222"/>
......
/socket-binding-group>
Before discussing the setup and configuration of our Hotrod client which will be used to interact with our JDG clustered HotRod server, we will start up each server instance to ensure our newly configured JDG distributed cache starts up correctly.
Open up 3 console Windows or Linux and execute the following start up commands:
Console 1:
1) Navigate to <JDG_HOME>\server1\jboss-datagrid-6.2.0-server\bin
2) Execute this command to start the first instance of our JDG cluster denoted "server1": clustered -c=clustered1.xml -Djboss.node.name=server1
Console 2:
1) Navigate to <JDG_HOME>\server2\jboss-datagrid-6.2.0-server\bin
2) Execute this command to start the second instance of our JDG cluster denoted "server2": clustered -c=clustered2.xml -Djboss.node.name=server2
Console 3:
1) Navigate to <JDG_HOME>\server3\jboss-datagrid-6.2.0-server\bin
2) Execute this command to start the third instance of our JDG cluster denoted "server3": clustered -c=clustered3.xml -Djboss.node.name=server3
Providing all 3 JDG instances have started up correctly, you should see output in the console window whereby we can see there are 3 JDG instances in the JGroups view:
![]()
HotRod Client Development Setup
Now that the Hotrod server is up and running, we now need to develop a Hotrod Java client which will interact with the clustered server application. The development environment consists of the following tools.
1) JDK Hotspot 1.7.0_45
2) IDE - Eclipse Kepler Build id: 20130919-0819
The HotRod client application is a simple application consisting of two Java classes. The application allows users to retrieve a reference to the distributed cache from the JDG server and then perform these actions:
a) add new cinema objects.
b) add and remove shows to each cinema object.
c) print the list of all cinemas and shows stored in our distributed cache.
The source code can be downloaded from github @ https://github.com/davewinters/JDG. We could use maven here to build and execute our application by configuring the maven settings.xml to point to the maven repository files we downloaded earlier and set up a maven project file (pom.xml) to build and execute the client application.
In this article we will build our application using the Eclipse IDE and run the client application on the command line. To create a HotRod client application and execute the sample application, one should complete the following steps:
1) Create a new Java Project in Eclipse
2) Create a new package named uk.co.c2b2.jdg.hotrod and import the source code that has been downloaded from Github mentioned previously.
3) Now we need to configure the build path in Eclipse to the appropriate JDG client jar files which are required to compile application. You should include all the client jar files in the project build path. These jar files are contained in the JDG installation zip file. For example on my machine these jar files are located in the directory: <JDG_HOME>\server1\jboss-datagrid-6.2.0-server\client\hotrod\java
4. Providing the Eclipse build path has been configured appropriately, the application source should compile without issue.
5. We will need to execute the Hotrod application by opening the console window and executing the following command. Note the path specified here will differ depending on where the JDG client jar files and application class files are located in your environment:
java -classpath ".;C:\Users\David\Installs\jbossdatagrids62\server1\jboss-datagrid-6.2.0-server\client\hotrod\java\commons-pool-1.6-redhat-4.jar;C:\Users\David\Installs\jbossdatagrids62\server1\jboss-datagrid-6.2.0-server\client\hotrod\java\infinispan-client-hotrod-6.0.1.Final-redhat-2.jar;C:\Users\David\Installs\jbossdatagrids62\server1\jboss-datagrid-6.2.0-server\client\hotrod\java\infinispan-commons-6.0.1.Final-redhat-2.jar;C:\Users\David\Installs\jbossdatagrids62\server1\jboss-datagrid-6.2.0-server\client\hotrod\java\infinispan-query-dsl-6.0.1.Final-redhat-2.jar;C:\Users\David\Installs\jbossdatagrids62\server1\jboss-datagrid-6.2.0-server\client\hotrod\java\infinispan-remote-query-client-6.0.1.Final-redhat-2.jar;C:\Users\David\Installs\jbossdatagrids62\server1\jboss-datagrid-6.2.0-server\client\hotrod\java\jboss-logging-3.1.2.GA-redhat-1.jar;C:\Users\David\Installs\jbossdatagrids62\server1\jboss-datagrid-6.2.0-server\client\hotrod\java\jboss-marshalling-1.4.2.Final-redhat-2.jar;C:\Users\David\Installs\jbossdatagrids62\server1\jboss-datagrid-6.2.0-server\client\hotrod\java\jboss-marshalling-river-1.4.2.Final-redhat-2.jar;C:\Users\David\Installs\jbossdatagrids62\server1\jboss-datagrid-6.2.0-server\client\hotrod\java\protobuf-java-2.5.0.jar;C:\Users\David\Installs\jbossdatagrids62\server1\jboss-datagrid-6.2.0-server\client\hotrod\java\protostream-1.0.0.CR1-redhat-1.jar" uk/co/c2b2/jdg/hotrod/CinemaDirectory
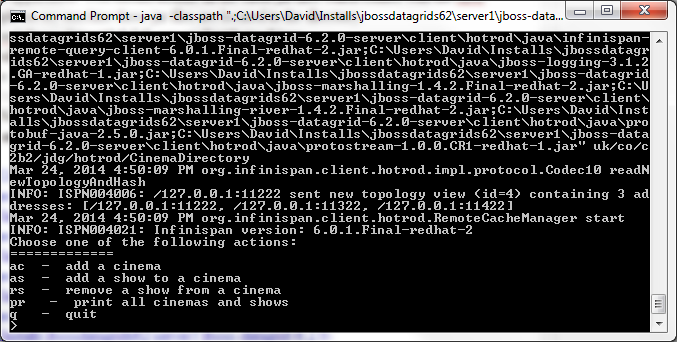
6. The Hotrod client at runtime provides the end user with a number of different options to interact with the distributed cache as we can view from the console window below.
![]()
Client Application Principal API Details
We will not provide a detailed overview of the Hotrod application code however we will describe solely the principal API and code details briefly.
In order to interact with the distributed cache on the JDG cluster using the Hotrod protocol, we will use the RemoteCacheManager Object which will allow us to retrieve a remote reference to the distributed cache. We have initialised a Properties object with the list of JDG instances and the associated with HotRod server port on each instance. We can add Cinema objects into the distributed cache using the RemoteCache.put() method.
private RemoteCacheManager cacheManager;
private RemoteCache<String, Object> cache;
properties.setProperty(ConfigurationProperties.SERVER_LIST, "127.0.0.1:11222;127.0.0.1:11322;127.0.0.1:11422");
cacheManager = new RemoteCacheManager(properties);
cache = cacheManager.getCache("directory-dist-cache");
.....
cache.put(cinemaKey, cinemalist);
For further details on JDG please visit: http://www.redhat.com/products/jbossenterprisemiddleware/data-grid/
<socket-binding name="hotrod" interface="management" port="11222"/>
......
/socket-binding-group>
Before discussing the setup and configuration of our Hotrod client which will be used to interact with our JDG clustered HotRod server, we will start up each server instance to ensure our newly configured JDG distributed cache starts up correctly.
Open up 3 console Windows or Linux and execute the following start up commands:
Console 1:
1) Navigate to <JDG_HOME>\server1\jboss-datagrid-6.2.0-server\bin
2) Execute this command to start the first instance of our JDG cluster denoted "server1": clustered -c=clustered1.xml -Djboss.node.name=server1
Console 2:
1) Navigate to <JDG_HOME>\server2\jboss-datagrid-6.2.0-server\bin
2) Execute this command to start the second instance of our JDG cluster denoted "server2": clustered -c=clustered2.xml -Djboss.node.name=server2
Console 3:
1) Navigate to <JDG_HOME>\server3\jboss-datagrid-6.2.0-server\bin
2) Execute this command to start the third instance of our JDG cluster denoted "server3": clustered -c=clustered3.xml -Djboss.node.name=server3
Providing all 3 JDG instances have started up correctly, you should see output in the console window whereby we can see there are 3 JDG instances in the JGroups view:

HotRod Client Development Setup
Now that the Hotrod server is up and running, we now need to develop a Hotrod Java client which will interact with the clustered server application. The development environment consists of the following tools.
1) JDK Hotspot 1.7.0_45
2) IDE - Eclipse Kepler Build id: 20130919-0819
The HotRod client application is a simple application consisting of two Java classes. The application allows users to retrieve a reference to the distributed cache from the JDG server and then perform these actions:
a) add new cinema objects.
b) add and remove shows to each cinema object.
c) print the list of all cinemas and shows stored in our distributed cache.
The source code can be downloaded from github @ https://github.com/davewinters/JDG. We could use maven here to build and execute our application by configuring the maven settings.xml to point to the maven repository files we downloaded earlier and set up a maven project file (pom.xml) to build and execute the client application.
In this article we will build our application using the Eclipse IDE and run the client application on the command line. To create a HotRod client application and execute the sample application, one should complete the following steps:
1) Create a new Java Project in Eclipse
2) Create a new package named uk.co.c2b2.jdg.hotrod and import the source code that has been downloaded from Github mentioned previously.
3) Now we need to configure the build path in Eclipse to the appropriate JDG client jar files which are required to compile application. You should include all the client jar files in the project build path. These jar files are contained in the JDG installation zip file. For example on my machine these jar files are located in the directory: <JDG_HOME>\server1\jboss-datagrid-6.2.0-server\client\hotrod\java
4. Providing the Eclipse build path has been configured appropriately, the application source should compile without issue.
5. We will need to execute the Hotrod application by opening the console window and executing the following command. Note the path specified here will differ depending on where the JDG client jar files and application class files are located in your environment:
java -classpath ".;C:\Users\David\Installs\jbossdatagrids62\server1\jboss-datagrid-6.2.0-server\client\hotrod\java\commons-pool-1.6-redhat-4.jar;C:\Users\David\Installs\jbossdatagrids62\server1\jboss-datagrid-6.2.0-server\client\hotrod\java\infinispan-client-hotrod-6.0.1.Final-redhat-2.jar;C:\Users\David\Installs\jbossdatagrids62\server1\jboss-datagrid-6.2.0-server\client\hotrod\java\infinispan-commons-6.0.1.Final-redhat-2.jar;C:\Users\David\Installs\jbossdatagrids62\server1\jboss-datagrid-6.2.0-server\client\hotrod\java\infinispan-query-dsl-6.0.1.Final-redhat-2.jar;C:\Users\David\Installs\jbossdatagrids62\server1\jboss-datagrid-6.2.0-server\client\hotrod\java\infinispan-remote-query-client-6.0.1.Final-redhat-2.jar;C:\Users\David\Installs\jbossdatagrids62\server1\jboss-datagrid-6.2.0-server\client\hotrod\java\jboss-logging-3.1.2.GA-redhat-1.jar;C:\Users\David\Installs\jbossdatagrids62\server1\jboss-datagrid-6.2.0-server\client\hotrod\java\jboss-marshalling-1.4.2.Final-redhat-2.jar;C:\Users\David\Installs\jbossdatagrids62\server1\jboss-datagrid-6.2.0-server\client\hotrod\java\jboss-marshalling-river-1.4.2.Final-redhat-2.jar;C:\Users\David\Installs\jbossdatagrids62\server1\jboss-datagrid-6.2.0-server\client\hotrod\java\protobuf-java-2.5.0.jar;C:\Users\David\Installs\jbossdatagrids62\server1\jboss-datagrid-6.2.0-server\client\hotrod\java\protostream-1.0.0.CR1-redhat-1.jar" uk/co/c2b2/jdg/hotrod/CinemaDirectory
6. The Hotrod client at runtime provides the end user with a number of different options to interact with the distributed cache as we can view from the console window below.
Client Application Principal API Details
We will not provide a detailed overview of the Hotrod application code however we will describe solely the principal API and code details briefly.
In order to interact with the distributed cache on the JDG cluster using the Hotrod protocol, we will use the RemoteCacheManager Object which will allow us to retrieve a remote reference to the distributed cache. We have initialised a Properties object with the list of JDG instances and the associated with HotRod server port on each instance. We can add Cinema objects into the distributed cache using the RemoteCache.put() method.
private RemoteCacheManager cacheManager;
private RemoteCache<String, Object> cache;
.....
Properties properties = new Properties();properties.setProperty(ConfigurationProperties.SERVER_LIST, "127.0.0.1:11222;127.0.0.1:11322;127.0.0.1:11422");
cacheManager = new RemoteCacheManager(properties);
cache = cacheManager.getCache("directory-dist-cache");
.....
cache.put(cinemaKey, cinemalist);
For further details on JDG please visit: http://www.redhat.com/products/jbossenterprisemiddleware/data-grid/
Webinar: Introduction to JBoss Data Grid -- Installation, Configuration and Development
